
Before cutting your fabric you have to prep it first, but I already wrote about that in one of my very first posts here.
Now that your fabric is prepped, let's talk layout...
My home sewing guru/mentor and I were musing one day about pattern layouts and where the whole "fold your fabric in half" mantra came from. Maybe it was assumed a home sewer has limited space and fabric folding is a necessity? Certainly I can understand the efficiency in cutting out two layers at once BUT, what you gain in efficiency you most certainly loose in wastage and accuracy.
While still working in "the industry" the designer I was working for and I were one day walking down the cutting floor when she stopped me mid walk and point at the fabric scraps on the floor saying "That's my money on the floor". Until that point, I had never thought of it that way. Can you imagine throwing away 20% or 30% of your fabric (essentially your money) simply because you folded it in half and/or had an inefficient layout to cut out a sewing pattern?
But other than economics, there is, more importantly, accuracy. Folded or not fabric shifts, it just does. So the more accurate you can be in keeping your patterns on grain, the nicer your garment will hang.
So now, let's finally talk about LAYOUT... and how I was taught to do it.
Before you start placing your patterns on the fabric to be cut, take a look at your pattern pieces first. Make sure your pattern grainlines are nice and long. They should be about 3/4 the length of your entire pattern piece. The longer the marked grainline, the better your accuracy.
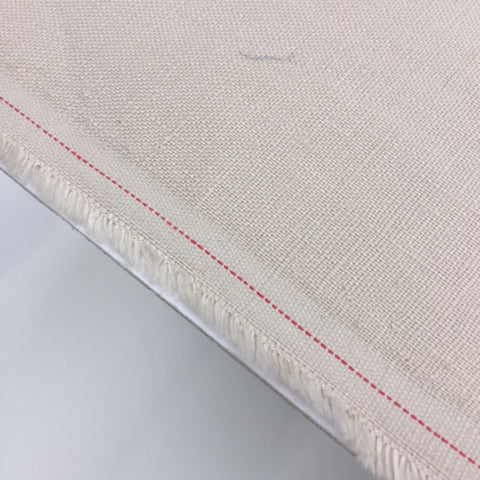
Next, find yourself a table with a nice, long straight edge. With your fabric WRONG* side up, line up your selvage with the straight edge of the table. This ensures your selvage is straight and therefore your fabric grain is straight. The edge of that table will be your marker against which you'll align your pattern piece's grainlines.
***I know not all fabrics have an obvious right and wrong side. In this case pick which side will be your "wrong side" and stay consistent. This way, once you trace and cut your pattern out you'll know all your chalk marked pieces are on the INSIDE of the garment.***
Chances are your fabric will be wider than the table you're cutting on. Gently fold up the excess fabric at the other edge of the table so it doesn't hang over the tables' edge.
Now that your fabric is nice and straight and all bubbles and wrinkles are smoothed out, it's time to place your pattern pieces out.
I like to start with the main and biggest pieces. Remember, because you're cutting one layer at a time, you'll need to flip your pattern pieces to get a right and left pattern piece. To prevent confusion, I like to give myself a little check mark along the pattern's grainline so I know I already cut that side.
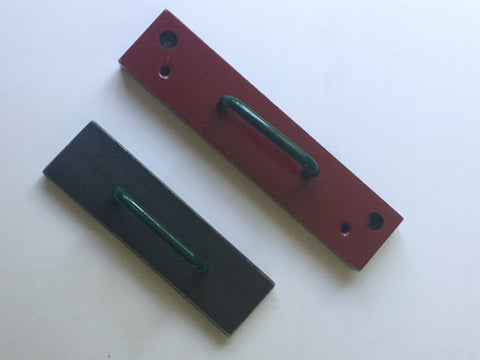
Pick your first pattern piece. Place in on the fabric. Hold the pattern in place with a weight. Weights are better than pins. Any weight will do. Large washers from the hardware store, books, magazines or cans of food. Use your imagination with this one.
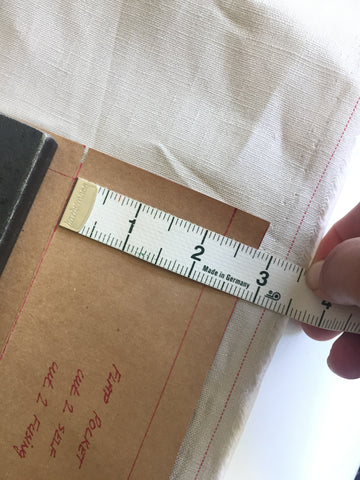
To place your patterns on grain, measure from one tip of the marked grainline to the edge of the table. Then repeat at the other end of the grainline. There is no need to measure in the middle of the pattern. If the opposite ends of your grainline are the same distance from the table's edge, so will be the middle.
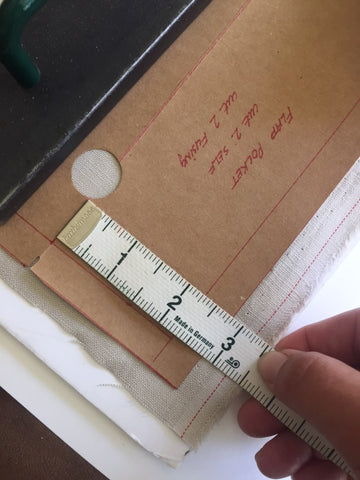
Adjust your pattern accordingly until your measurements are the same at both ends of the grainline. Then place several weights on your pattern piece so it does not shift when you trace it out. Always trace your pattern out, then cut. I never cut my fabric with the pattern pieces and weights still on it. Once again, you're removing the possibility of your fabric shifting under weights.
For pieces that require cutting "on fold" I simply trace the one side of the pattern piece and mark centre front by either tracing the whole centre front line or just the top and bottom notches, and flip the pattern over, line up centre front, and trace the other side.
The key is to have as many pattern pieces traced, as close together as possible, before you start cutting out your pieces. Whenever I can, I try to have my patterns share straight lines so I can be efficient in my cuttting time. It's a common practice in the industry as it not only increases efficiency in fabric useage, it also cuts down on cutting time.
Once you've traced out and fit in as many pieces as you can, you're ready to cut.
Call me old fashioned, but I love a great pair of scissors for cutting out my fabric. Not just any scissor will do though. If you do want to use scissors consider investing in a pair with heavy long blades and a firm heavy handle.
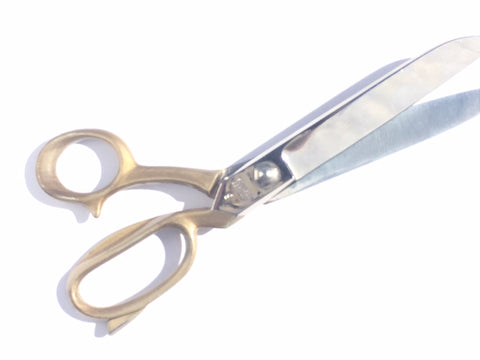
A long heavy blade will not slip and slide on you like a conventional scissor will. The weightier the scissor the better control you have.
I hope you try these tips out. It's amazing how these seemingly small changes can up your sewing mastery.
Next up... All about Darts... how to mark them and sew them... and you've guesses it, no straight lines here...