Hello Again!
Are you ready to sew some pockets? I know the thought of welt pockets and slashing any garment you are working on makes most sewists go pale at the thought, but these welts are not like any others! I designed them to be constructed on a pocket panel (like a square) so if there is an error, your coat will not be ruined.
Shall we start?
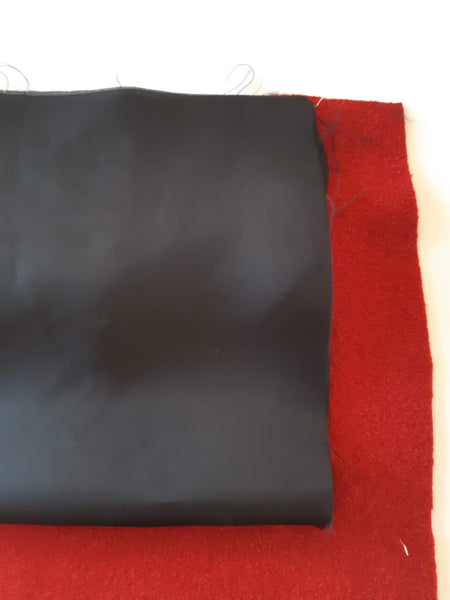
This welt is not sewn in the traditional "welt pocket" steps, you'll notice this right with the first step as you place the pocket bag (preferably cut out of lining) on the wrong side of the pocket panel.
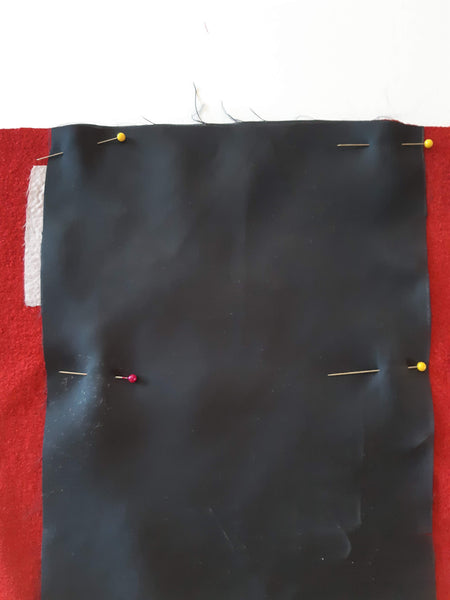
Make sure your pocket bag is nicely centred on the welt and the top of the pocket bag is nice and flush with the top of the pocket panel. The pocket bag notches will be at about the center of the pocket panel.
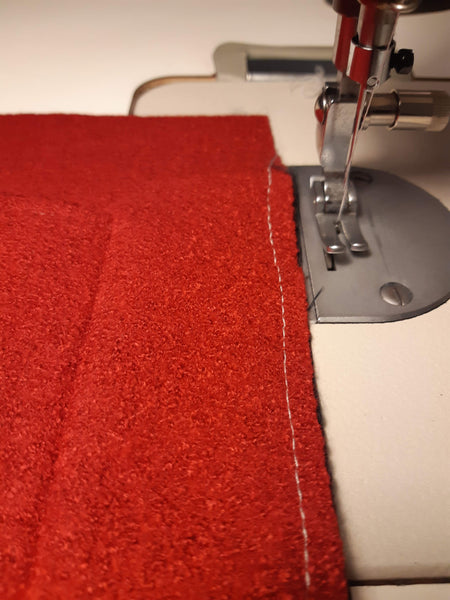
The pocket bag should extent 1/2" beyond the welt pocket opening. Once you're happy with the placement of the pocket bag, either keep it pinned in place, or do a machine baste stitch about 1/4" from the edge of the top of the pocket panel to keep the bag from shifting.
Personally, I like to baste at the top edge and keep my pins in under the welt to keep things from shifting... too much anyway.
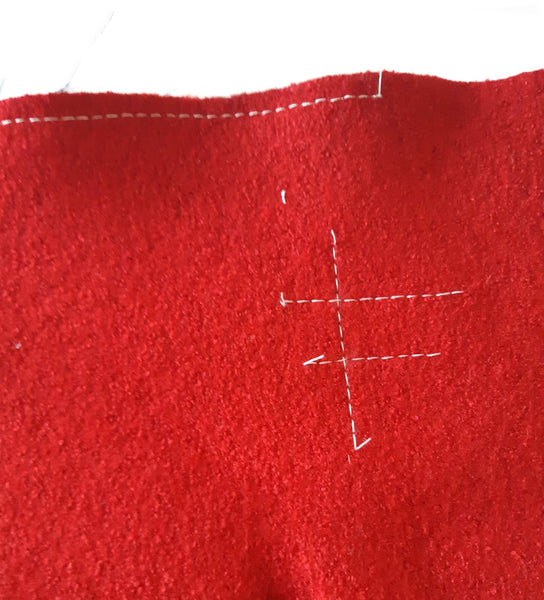
Next, let's machine baste stitch the corners of the welt opening. These will be your guides to help with your welt and flap placement. Extend the horizontal baste well beyond the vertical "end of welt" baste.
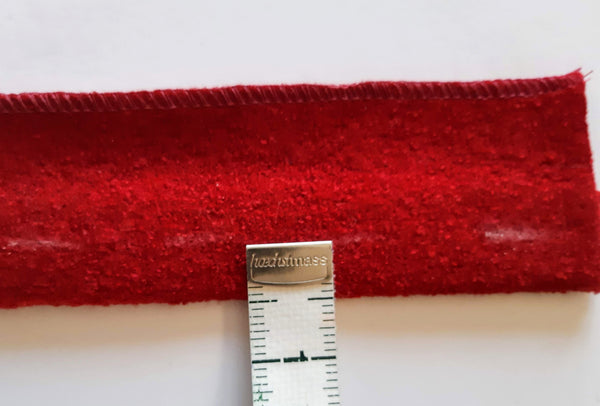
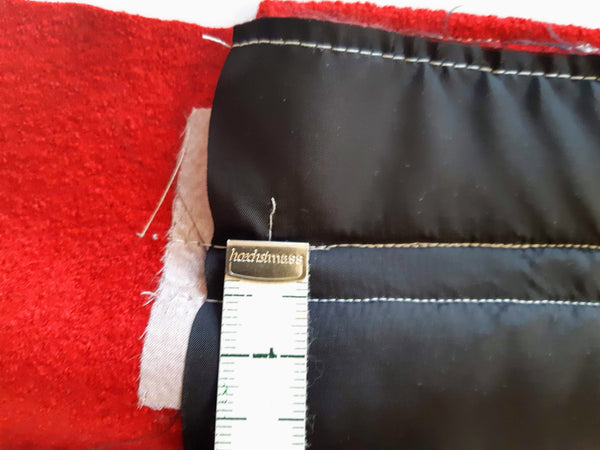
Before you sew the welt on, mark your stitching line. Since the finished width is 1/2", your stitch line is 1/2" from the pressed edge of your welt. Mark this stitch line on the side of the welt that also includes the extended welt facing.
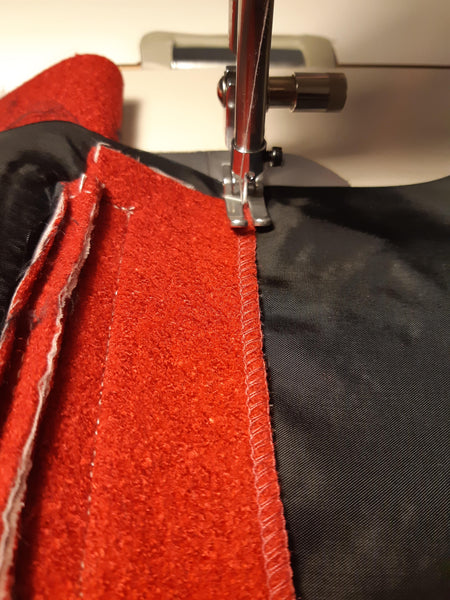
With your pocket panel RIGHT side up, place your welt on the panel, matching your marked stitch line with the basted guide stitch of the bottom of your welt opening. Your welt piece will extend past the vertical baste stitch that indicates the end of the welt. It should extend by 1/2" on both sides of your welt opening.
Stitch your welt in place. Don't forget to back stitch!
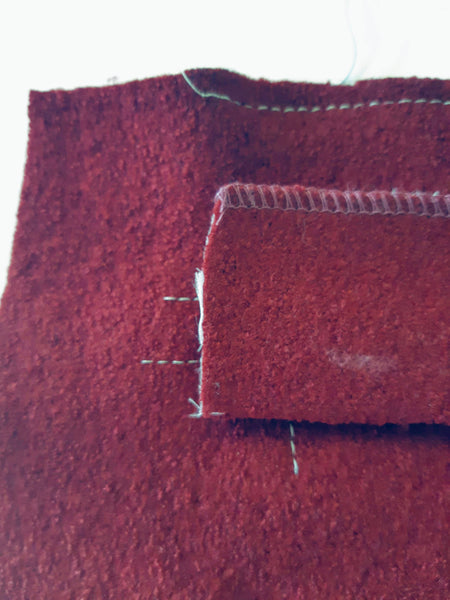
Now, let's prep your pocket flap. Because the fabric I'm using has a little bit of stretch in it I did a baste stitch, within 1/4" of the pocket's unfinished edge, to stabilize the pocket and prevent it from stretching out as I sew it.
Place your pocket flap into place on the pocket panel. The unfinished pocket flap edge should be right up against the welt seam you just sewed. It will be pointing "up" and past the top edge of the pocket panel. Keep in mind that the pocket flap NEEDS to FIT exactly within the welt opening baste stitch. If CANNOT extend beyond the welt end marking much like the welt did.
Stitch into place and don't forget to back stitch.
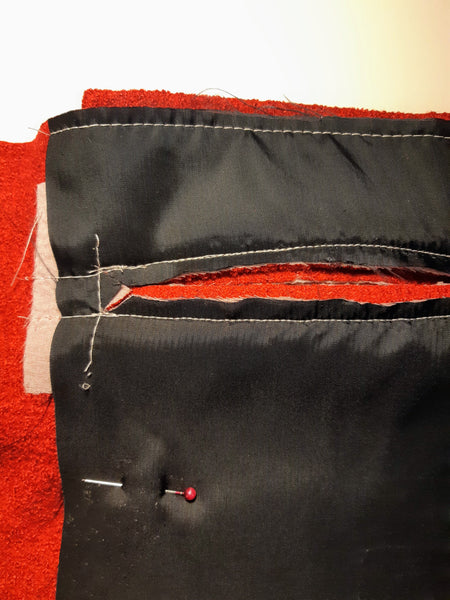
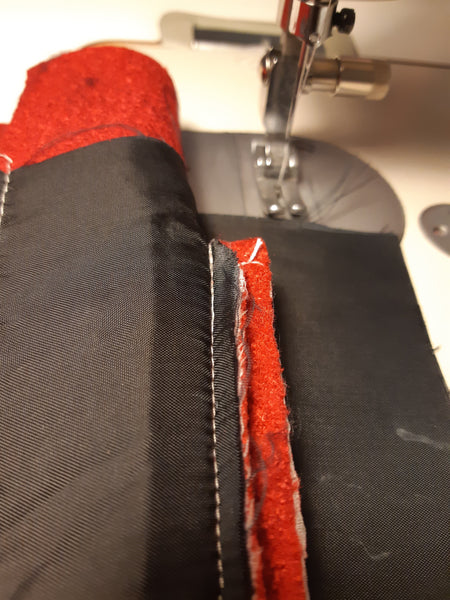
Check if your welt stitch lines are exactly 1/2" in width and that your flap pocket stitches and your welt stitches end at the exact same time. Once you're happy, slash your pocket OPEN!! Yay!!
Remember to slash down the center of the pocket. Give yourself nice and big triangles at the corners. The closer you get to slashing the triangle to your last stitch point, the better. If you slash PAST the last stitch, you'll have a hole in your welt corner. If you don't get close enough to that last stitch, you'll have rounded corners on your welt.
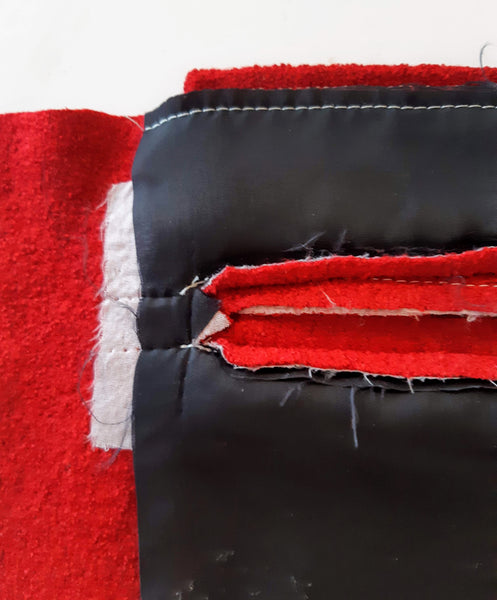
Take out your basted guidelines and press open your seams. The wonder of heat and steam from the iron will flatten the bulk in the seams and give you a nice clean edge.
It's time to flip your welt pocket to the inside and secure the corners. You're just a few steps away from finishing!!
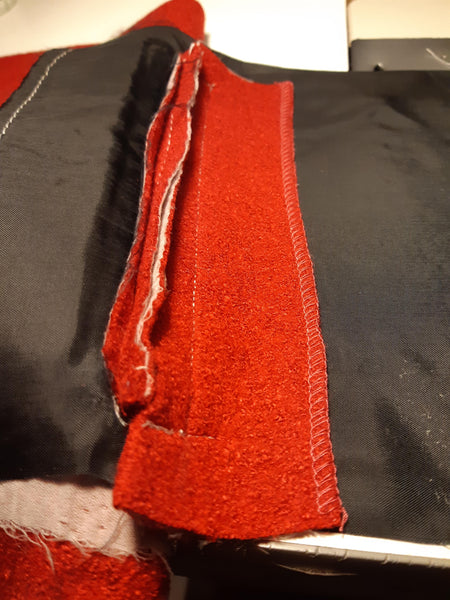
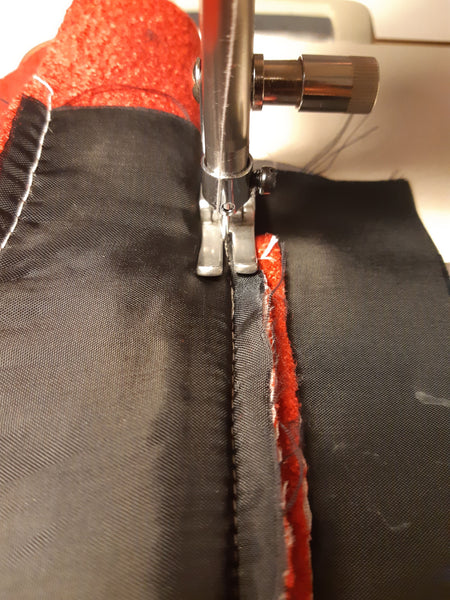
Now that you've flipped your welt you'll notice that the part of your welt that extended past the actual welt and its' seam allowance has now become an inside facing for the welt. The welt was designed this way to reduce pattern pieces and, most importantly, to reduce bulk.
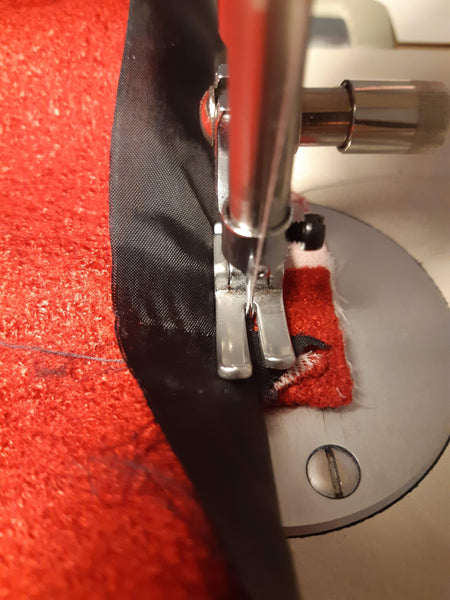
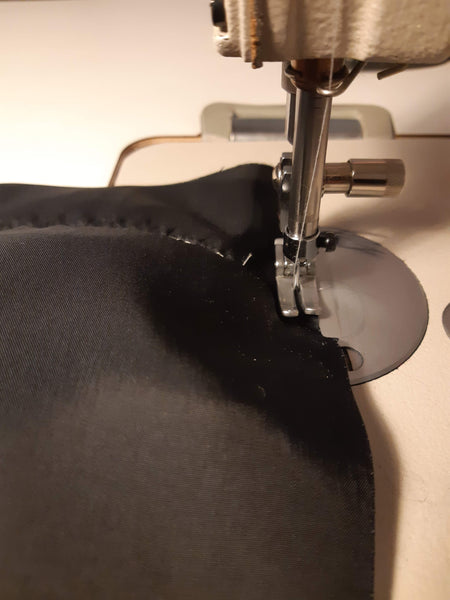
Sew the facing to the pocket bag. Make sure to move the pocket panel out of the way. You don't want to accidentally sew the pocket bag to the pocket panel.
Time to secure the welt corners.
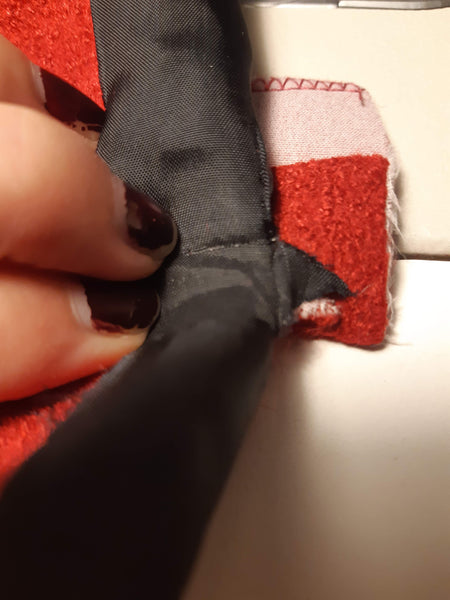
With your pocket panel right side up, peel back the side of the pocket panel to reveal the little triangle that needs to be secured to the welt.
You want to get in nice and close to the the edge of the folded back pocket panel as you stitch the triangle down to the welt. If you don't get in very close you run the risk of having fraying welt corners.
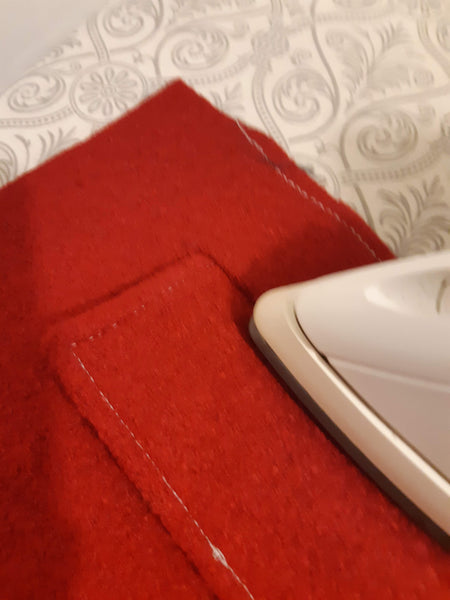
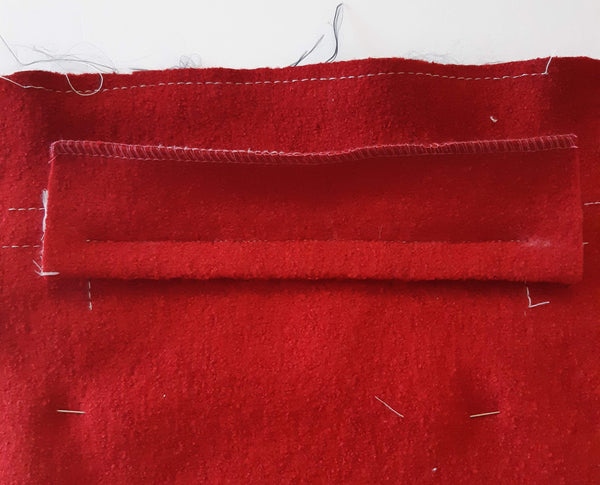
Flip your pocket flap down so it now covers the welt and give it a good press into place.
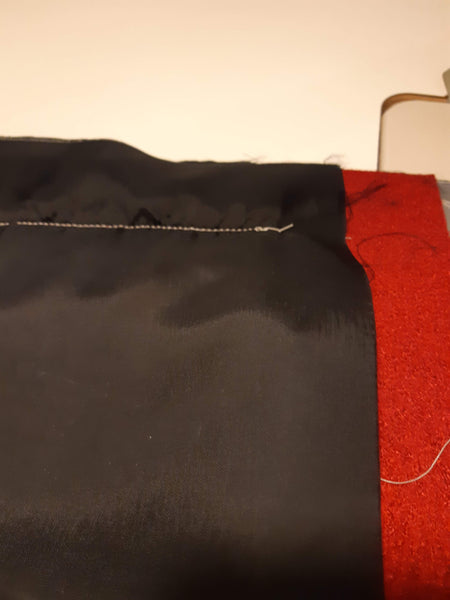
Fold your pocket bag up at the notches. It should cover all your welt stitching and end at the top of the the pocket panel.
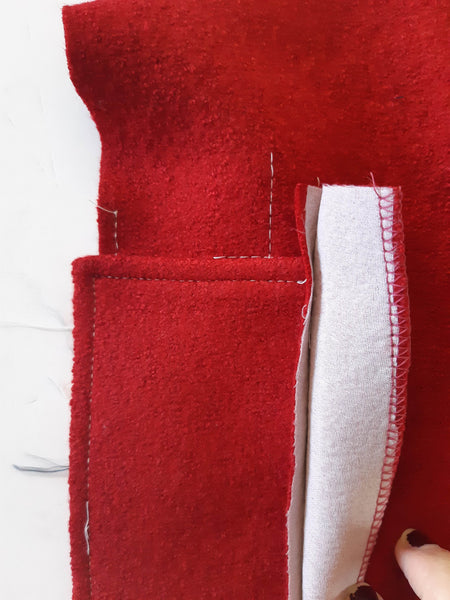
Before you close off your pocket, there is one more step; attaching the pocket flap to the lining so it doesn't flop around. And so, with the pocket panel right side up, flip the panel's top to the side and you'll see the pocket flap's seams...
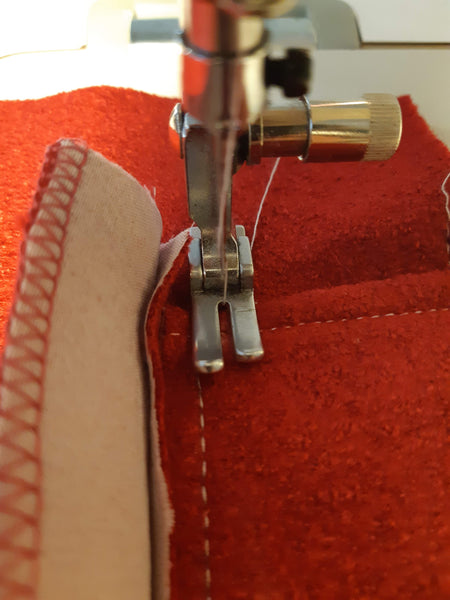
To attach the pocket flap, stitch it to the pocket bag right on top of your previous stitches.
Now that your flap is attached, it's time to close up the pocket bag's side seams.
And voila! You are done!! Not so bad, right? I promise the second one will be much easier.